
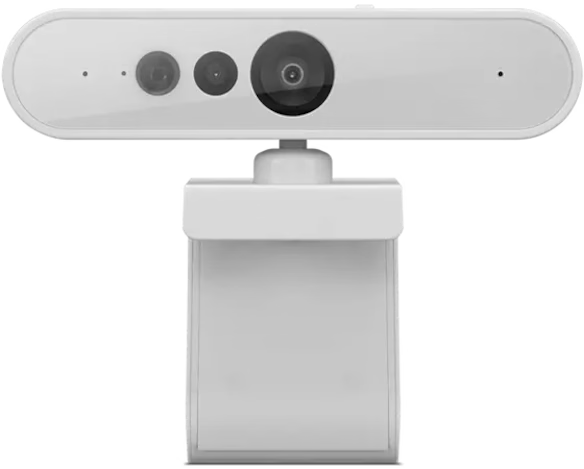
I recently switched to using a Mini PC connected to a TV and the lack of biometrics was felt quite intensely compared to a laptop. While using a fingerprint reader was not going to be quite as practical, I decided to go the route of Windows Hello with the Lenovo 510 FHD Webcam. While it was plug and play on Windows, provided the camera firmware is updated, my dual boot setup necessitated that I get the same working with CachyOS. As is the case these days, the entire troubleshooting was done with the help of AI (Gemini) and I spent substantial time to ensure the setup works with the login screen, terminal as well as GUI. Thus, I am presenting the steps below, in the words of the LLM.
Getting Windows Hello-style infrared (IR) facial authentication working seamlessly on a modern rolling-release Linux distribution like CachyOS with KDE Plasma requires more than just installing a package. The legacy howdy 2.x codebase struggles with modern Python and OpenCV dependencies, and KDE Plasma splits authentication across multiple PAM stacks (plasmalogin, kde-fingerprint, polkit-1, sudo, and kdesu).
This guide covers setting up howdy-next—the modern C++ rewrite powered by OpenCV’s YuNet and SFace ONNX models—from scratch on CachyOS (using the default fish shell) so that your IR camera unlocks your login screen, lock screen (hands-free, without clicking Unlock), terminal sudo, and GUI admin dialogs.
Prerequisites
- OS: CachyOS (or Arch-based distro running KDE Plasma 6)
- Shell: fish (CachyOS default; commands below are written for fish)
- Hardware: An IR-capable webcam (e.g., Lenovo 510 FHD / Performance Camera)
1. Install howdy-next and Download the ONNX Models
Avoid the legacy howdy and howdy-git AUR packages, which rely on outdated dlib bindings. Instead, install howdy-next, which uses OpenCV’s YuNet (face detection) and SFace (face recognition) neural networks.
- Install howdy-next from the AUR:
paru -S howdy-next - Run the built-in model downloader to fetch the required face_detection_yunet_2026may.onnx and face_recognition_sface_2021dec_int8.onnx files into /usr/share/howdy/models:
sudo howdy download-models
2. Identify and Configure Your IR Camera Node
Windows Hello IR webcams expose multiple /dev/video* nodes—typically a color RGB stream and a separate grayscale IR stream.
- List your video devices:
v4l2-ctl --list-devices
(If v4l2-ctl is missing, install v4l-utils via sudo pacman -S v4l-utils.) - Identify the IR node (on the Lenovo 510 FHD, /dev/video0 is RGB and /dev/video2 is IR). You can verify the IR feed and confirm it isn’t rotated sideways with ffplay /dev/video2.
- Update /etc/howdy/config.ini to point to your IR node:
sudo sed -i 's|^device_path = none|device_path = /dev/video2|' /etc/howdy/config.ini
3. Enroll and Test Your Face Model
Enroll your face under your primary user account and verify that recognition works reliably:
sudo howdy add
sudo howdy test
During enrollment, your camera’s red IR emitter LEDs should illuminate. Give the model a descriptive label (such as desk), and run howdy test to confirm fast detection.
4. Enable Howdy for Terminal sudo
To use face authentication for sudo commands while preserving password fallback if your face isn’t visible, insert pam_howdy.so at the top of /etc/pam.d/sudo:
sudo sed -i '1a auth sufficient pam_howdy.so' /etc/pam.d/sudo
Test it in a new terminal session by invalidating your cached credentials first:
sudo -k; sudo ls
5. Enable Howdy for the Graphical Login Screen (plasmalogin)
CachyOS uses KDE’s plasmalogin display manager, whose default PAM rules live in /usr/lib/pam.d/plasmalogin. Copy the file to /etc/pam.d/ so system updates don’t overwrite your changes, then enable Howdy:
sudo cp /usr/lib/pam.d/plasmalogin /etc/pam.d/plasmalogin
sudo sed -i '1a auth sufficient pam_howdy.so' /etc/pam.d/plasmalogin
Tip on KDE Wallet: Because biometric login bypasses typing your user password, KDE Wallet cannot auto-decrypt on login. If you want a completely prompt-free login, open KWalletManager, select Change Password, and leave the new password fields blank.
6. Enable Click-Free Lock Screen Unlock (kde-fingerprint)
If you add Howdy to /etc/pam.d/kde, Plasma treats it as a manual password flow—meaning you still have to click the Unlock button after your face is recognized.
Instead, hook Howdy into KDE’s dedicated background biometric stack (/etc/pam.d/kde-fingerprint), which kscreenlocker runs automatically on wake and dismisses the lock screen immediately upon a match:
printf '#%%PAM-1.0\n\nauth       required                    pam_shells.so\nauth       requisite                   pam_nologin.so\nauth       requisite                   pam_faillock.so      preauth\nauth       required                    pam_env.so\nauth       required                    pam_howdy.so\n\naccount    include                     system-local-login\n\npassword   required                    pam_deny.so\n\nsession    include                     system-local-login\n' | sudo tee /etc/pam.d/kde-fingerprint > /dev/null
sudo rm -f /etc/pam.d/kde
(Note: Make sure pam_permit.so is omitted from kde-fingerprint—otherwise a failed face scan could fall through and unlock the screen without authentication.)
Lock your screen (Meta + L or loginctl lock-session) and wake the display to verify hands-free unlock.
7. Enable Howdy for GUI Polkit Dialogs (polkit-1)
Graphical admin prompts in KDE (such as Discover, KDE Partition Manager, and pkexec) use Polkit. Copy /usr/lib/pam.d/polkit-1 to /etc/pam.d/ and reload systemd so howdy-next’s Polkit agent override (10-howdy.conf) allows the helper service to access /dev/video2:
sudo cp /usr/lib/pam.d/polkit-1 /etc/pam.d/polkit-1
sudo sed -i '1a auth sufficient pam_howdy.so' /etc/pam.d/polkit-1
sudo systemctl daemon-reload
Test it with:
pkexec true
8. Enable Howdy for kdesu & Shell Installers
KDE’s kdesu utility defaults to su under the hood, which authenticates against root rather than your user account. Switching kdesu to use sudo lets KDE elevation prompts authenticate against your enrolled user face model:
kwriteconfig6 --file kdesurc --group super-user-command --key super-user-command sudo
sudo sed -i '2a auth            sufficient      pam_howdy.so' /etc/pam.d/su /etc/pam.d/su-l
- Handling Zenity-based installers: Third-party bash scripts that check sudo -n true and fall back to zenity –password | sudo -S pipe a plain string into stdin, deliberately bypassing interactive PAM modules. Before running those scripts in Konsole, run sudo -v once—Howdy will scan your face and cache your sudo timestamp so the installer skips the Zenity password popup altogether.
9. Verify Logs and Fallback Security
You can audit your authentication logs in journalctl to confirm that pam_howdy.so is actively verifying your face across services and safely falling back to a password prompt whenever your face is out of view:
journalctl -b --no-pager | grep -iE "howdy|pam_unix" | tail -n 20
You should see pam_howdy(…): Face verification succeeded entries for sudo:auth, kde-fingerprint:auth, polkit-1:auth, and plasmalogin:auth, alongside Face verification timed out followed by a standard password fallback whenever you cover the camera.

